Brilliant Invention Gen 20 Hydrogen Generator July 2 2026
Brilliant Invention Gen 20 Hydrogen Generator ---(update Feb 7... Full Story
Perth, West Australia





by Gavan Knox MSc, BSc, BEd, Inventor
WhatsApp call +61 403177183
contact gavan@hfuel.com.au
https://hydrogenfuelsystems.com.au
How to Inspect HHO Hoses Before They Cost You Fuel – sept 23. A loose hose clamp can turn a properly fitted HHO system into a fuel-saving opportunity that never reaches the intake. Knowing how to inspect HHO hoses is not a cosmetic maintenance task. It is a direct check on gas delivery, engine-bay safety and the performance you expect from your hydrogen generator system.
Your hoses carry generated HHO gas from the cell through the system’s safety components and into the engine intake. If that path leaks, kinks, softens or collapses, gas flow drops. That can reduce the system’s effectiveness, create inconsistent results and allow gas to escape where it does no useful work. Hoses used by hydrogenfuelsystems pty ltd are either 10 mm OD trucking Pneumatic piping made from HDPE plastic, Or 10 mm OD stainless steel 316 pipe ( Both excellent products in all conditions — HDPE is heat resistantand chemically resistant to most solvents)
For high-kilometre utes, trucks, generators, marine engines and 4WDs, a quick hose inspection should be part of the regular under-bonnet check. The harder the engine works, the more attention hose routing and condition deserve.
Start with the vehicle parked on level ground, the engine switched off and completely cool. Isolate the HHO system power supply before handling any hose, fitting or clamp. Work in a well-ventilated area and keep all flames, cigarettes, sparks and hot tools away from the engine bay.
Do not treat HHO hose inspection like checking a windscreen washer line. Hydrogen-containing gas is highly flammable. Never use a naked flame to find a leak. Do not pull hoses from fittings while the system is energised, and do not use excessive air pressure to test a system unless the installation instructions specifically permit it.
Open the bonnet and trace the hose route from the generator cell to the bubbler, water trap, filter or flashback protection device fitted to your system, then onwards to the intake connection. The exact layout depends on the kit and application, but every section of hose must be secure, cleanly routed and free from damage.
Look closely at the hose where it leaves the HHO cell. This area can be exposed to vibration, heat and electrolyte residue. The hose should sit fully over the outlet barb or fitting, with no visible split at the end and no whitening, stretching or distortion around the clamp.
Gently try to rotate the hose by hand. It should not spin freely on the fitting. A hose that moves easily may have an undersized clamp, a clamp that has loosened with heat cycles, or a hose that has softened from chemical exposure.
Check for dried residue around the outlet. White or crusty deposits can indicate electrolyte mist or a leak from a nearby connection. Clean the area with a suitable cloth, identify the source and correct it before putting the system back into service. Repeated residue is not something to ignore, particularly on vehicles that see long hot runs or rough roads.
A sound hose is only as good as its fittings. Inspect every join, including connections at the bubbler or reservoir, safety devices and intake port. Each hose should be pushed fully onto the fitting and supported by a correctly sized clamp where the installation requires one.
Look for clamps that are corroded, crooked, cutting into the hose or positioned too close to the hose edge. Over-tightening can damage the hose wall, while an under-tightened clamp can let gas escape under operating pressure. The goal is firm and even retention, not crushing force.
Pay particular attention to plastic barbs and elbows. These parts can develop fine cracks that are hard to see, especially after repeated heating and cooling in an Australian engine bay. If a fitting is brittle, stained, cracked or no longer holds the hose tightly, replace it rather than hoping it will hold through the next long trip.
Most HHO hose failures are caused by where the hose has been routed, not by the hose itself. A tidy installation protects flow and prevents premature replacement.
Run your fingers along the full length of the hose and look for these warning signs:
Keep the hose clear of exhaust components, turbochargers, manifolds, belts, fans and sharp sheet metal. Heat shielding, protective sleeving and proper mounting clips can make a major difference on a hard-working diesel, a loaded work vehicle or a generator operating for extended periods.
Avoid tight bends. A kink can restrict flow just as effectively as a blocked line, even when the hose appears intact at a glance. If the route requires a sharp change of direction, use an appropriate fitting rather than forcing the hose into a bend it was not designed to hold.
Hose length also matters. Excess line creates unnecessary places for rubbing, sagging and restriction. At the same time, do not pull the hose tight across the engine bay. Allow enough movement for engine vibration without permitting the line to contact heat or moving components.
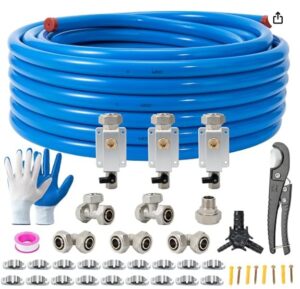
The intake connection is where the HHO gas enters the engine’s air stream, so it deserves extra attention. Inspect the fitting for looseness, cracking and signs that it has shifted in the intake ducting or manifold connection point.
A leaking intake connection can affect both HHO delivery and normal engine air flow. On modern vehicles, unmetered air leaks may contribute to rough running, fault codes or inconsistent performance. If the engine develops drivability problems after any installation work, check the intake fitting and hose connection before assuming there is an electronic fault.
Make sure the hose is not being pulled sideways by its route. Side load on a small intake fitting can eventually loosen the connection or crack the surrounding plastic intake duct. The hose should approach the fitting naturally, without tension.
Visual inspection finds many faults, but a leak can exist at a connection that still looks normal. After checking hose condition and tightening or replacing any suspect hardware, test the system in accordance with the kit’s installation instructions.
A low-pressure leak check using a suitable leak-detection solution can reveal bubbles around joints and fittings. Apply the solution carefully to external connections only, then observe for bubbling while the system is operating as specified by the manufacturer. Keep the solution away from electrical terminals, relays and connectors, and wipe it off once testing is complete.
If you find a leak, do not simply add more sealant over the outside of the hose. Remove the cause. That may mean trimming a damaged hose end, replacing the hose, fitting a new clamp, changing a cracked barb or re-routing the line to remove strain. A proper repair protects gas flow and gives you a result you can trust.
Never ignore a repeated leak. If the same connection continues to fail, the problem may be vibration, incompatible hose material, excessive heat, an incorrect fitting size or a system layout issue. Solve the underlying cause rather than repeatedly tightening the same clamp.
Replace an HHO hose when it is cracked, hard, swollen, porous, flattened, contaminated or unable to grip securely on its fitting. Replace it immediately if it has rubbed through, melted, been cut or come into contact with a hot engine component.
Do not substitute random hose from the shed just because it fits over the barb. Hose material must suit the application, operating environment and the components used in the HHO system. A cheap vacuum hose may look acceptable on day one but fail quickly under heat, vibration or chemical exposure.
When replacing a section, use the correct internal diameter and make clean, square cuts. Route the replacement line before securing it, then check that it has adequate clearance across the full range of engine movement. On vehicles used off-road, on corrugated tracks or for towing, secure the hose more carefully because vibration loads are far higher than they are in normal suburban driving.
Inspect hoses after installation, again after the first few heat cycles, and whenever you carry out normal servicing under the bonnet. For commercial vehicles, generators and marine applications with long operating hours, add HHO hose checks to the regular maintenance sheet.
You should also inspect immediately after overheating, accident damage, major engine work, battery replacement or any repair that involves moving intake plumbing. A hose may be disturbed without anyone noticing, then slowly work loose once the vehicle returns to service.
Hydrogen Fuel Systems equipment is designed to support real-world fuel-saving and performance goals, but the installation must remain sealed, secure and correctly maintained. A five-minute hose check can prevent lost gas flow, protect your engine bay and keep your HHO system working where it counts – at the intake.
by Gavan Knox MSc, BSc, BEd, Inventor
WhatsApp call +61 403177183
contact gavan@hfuel.com.au
https://hydrogenfuelsystems.com.au
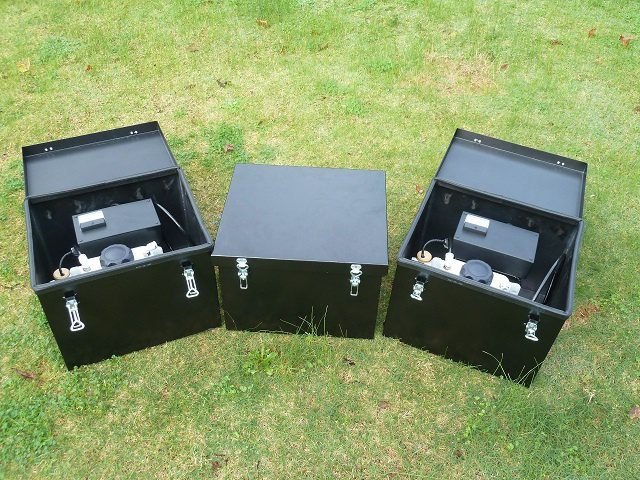
Brilliant Invention Gen 20 Hydrogen Generator ---(update Feb 7... Full Story

by Gavan Knox HFS whats app +61 403177183 gavan@hfuel.com.au... Full Story
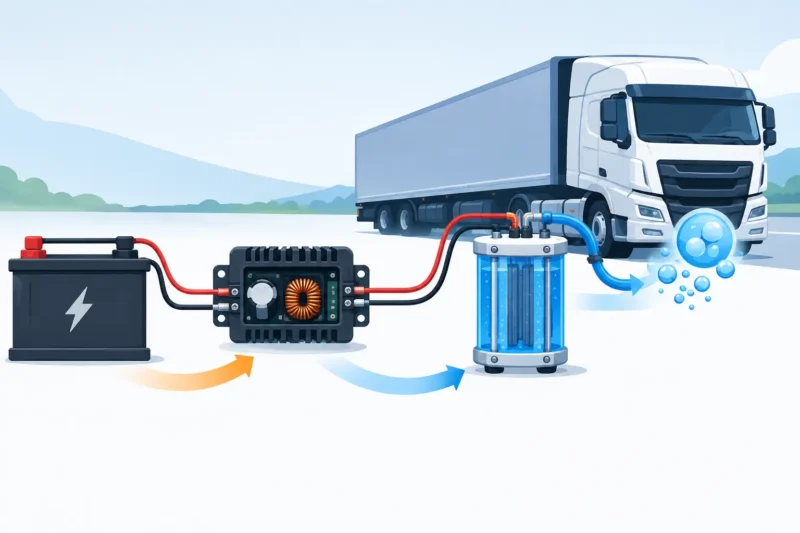
How 24V-to-13.8V Buck Configuration Regulators Affect HHO generation in... Full Story
A diesel that is smoking, using more fuel or... Full Story

How Do DC-DC Boost Regulators Affect Hydrogen Gas Production?... Full Story
Payment Methods Partner:

© 2023 - Hydrogenfuelsystems pty ltd