Brilliant Invention Gen 20 Hydrogen Generator July 2 2026
Brilliant Invention Gen 20 Hydrogen Generator ---(update Feb 7... Full Story
Perth, West Australia




by Gavan Knox MSc, BSc, BEd, Inventor
WhatsApp call +61 403177183
contact gavan@hfuel.com.au
https://hydrogenfuelsystems.com.au
If you want fuel savings and stronger engine response, installation is where the result is won or lost. A proper hydrogen generator installation guide is not about bolting on parts and hoping for the best. It is about mounting the system correctly, protecting the electrical side, managing heat and vibration, and setting the kit up so the engine gets a stable hydrogen supply every time you drive.
For owner-drivers, fleet operators and tradies, that matters. A badly mounted kit can shorten component life, create maintenance headaches and leave performance on the table. A correctly installed system gives you the best chance of seeing the fuel, torque and emissions improvements these units are built to deliver.

Our Instructions are Detailed , Clear , Easy to read and loaded with diagrams and Photos to explain how to correctly mount and operate our PATENTED Hydrogen Fuel systems
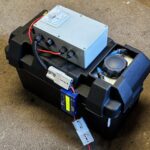
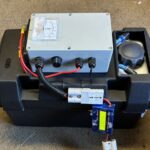
This guide is written for real-world automotive and engine applications – diesel or petrol, light vehicles or heavier gear, road use or stationary equipment. The basic installation logic stays the same whether you are fitting a compact unit to a passenger vehicle or stepping up to a larger system for a 4WD, truck, marine engine or generator.
The first decision is not where to drill a hole. It is choosing the correct system size for the engine and duty cycle. A vehicle that spends its life around town has different demands from a towing ute, a highway truck or a generator running under load for long periods. Oversizing or undersizing affects efficiency, fitment and the return you are chasing.
Before mounting anything, confirm the kit matches the engine size and how the engine is used. That is why system tiers such as Gen 10, Gen 15, Gen 20 and Gen 25 exist. They are not marketing fluff. They allow the hydrogen output to be matched to the application so the system can support combustion properly without creating avoidable installation compromises.
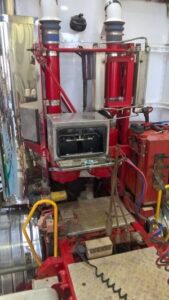
A smaller passenger vehicle usually has more freedom under the bonnet but less spare space for larger hardware. A work ute or 4WD may have stronger charging capacity and room for a bigger setup, but heat, dust and vibration become more serious. Trucks and generators often suit larger systems, but the installation standard has to be higher because runtime is longer and the operating environment is harsher. Stainless steel enclosure boxes are recommended for such applications . See photo below
If the engine already has known electrical faults, cooling issues or severe intake contamination, fix those first. Hydrogen enhancement is designed to improve combustion efficiency, not compensate for a worn-out charging system, split vacuum hoses or neglected servicing.

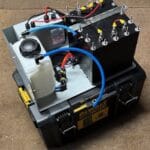

The generator cell needs a firm mounting point away from direct exhaust heat and obvious impact zones. Under-bonnet space is always a compromise, but there are some rules that do not change. The unit should sit upright where possible, remain accessible for service, and be mounted to minimise movement over corrugations, potholes and engine vibration.
Do not mount the cell hard against components that throw serious heat. Excessive heat can affect fluid stability, wiring life and long-term reliability. Leave enough clearance around the unit to inspect fittings, remove lines and carry out routine checks without dismantling half the engine bay.
Bracket quality matters more than many installers think. Thin, flexible mounts might hold for a week, then crack, loosen or shift. On a 4WD, truck or machinery application, heavy-duty brackets and quality fasteners are not optional. They are part of protecting the investment.
The specialist guide for HFS systems is shown in this link
If your setup uses a separate reservoir, place it where it can be checked and topped up easily. That sounds basic, but it is one of the main reasons some systems are neglected after installation. If the reservoir is hidden behind covers, jammed near moving parts or too close to heat, maintenance gets skipped.
Fluid lines should run cleanly with no sharp bends, pinch points or rub points. Secure them properly. A tidy hose run is not just cosmetic. It reduces wear, helps flow stability and makes faults easier to identify later.
This is the area where shortcuts do the most damage. The electrical side of the installation should be fused correctly, routed safely and connected with the right gauge cable for the current draw. Poor wiring creates voltage drop, heat, intermittent operation and premature component failure.
All wiring should be at least 8mm double insulated (8Band S) cable which has minimum electrical resistance , wastes almost not electrical energy as heat and is strong able to withstand the wear and tare of commercial applications
Take power from an appropriate source and use the correct protection components. Keep cable runs practical and avoid routing near sharp edges, turbo heat or areas where loom movement is constant. Every connection should be secure, insulated and protected from moisture and grime.
A relay-controlled setup is generally the smart way to ensure the system operates only when intended. That helps protect the battery and keeps operation tied to engine use rather than leaving the unit live by mistake. In working vehicles that start and stop frequently, proper switching logic is not a luxury. It is basic installation discipline.
A poor earth can make a good kit look faulty. Make sure the earth point is clean, solid and suited to the current load. Paint, corrosion and loose hardware all create resistance. The result is unstable performance.
Check battery condition and alternator output before final commissioning. If the charging system is already weak, adding any electrical load can expose that weakness fast. For commercial vehicles and generators, this check should be standard practice.
The hydrogen output needs to be introduced into the intake system in a controlled, secure way. Hose routing should be as short and protected as practical, with all fittings tight and positioned away from abrasion or excessive heat. If a bubbler, filter or flashback protection component is part of the setup, install it in the intended orientation and location.
Do not treat the intake connection as an afterthought. A poor connection point or messy hose routing can reduce consistency and make diagnosis harder if performance is not where it should be. The aim is steady delivery, not a rough improvised fit-up.
Modern engines vary. Some engine bays are straightforward. Others are packed tight with covers, sensors and emissions hardware. That is where application-specific instructions matter. A proper fitment on a late-model diesel can look very different from an older mechanically simpler setup.
A system is not finished when the last bolt is tightened. It is finished when it has been tested properly. Start with a visual inspection. Check mounting security, hose routing, fluid level, electrical protection and clearance around hot and moving parts.
Then confirm the system powers up and operates as intended. Watch for leaks, unstable current draw, abnormal heat or vibration-related movement. If the vehicle is road-registered, carry out a controlled test drive and recheck everything after the first run.
This is also the right time to establish a baseline. Serious buyers care about measurable return, not guesses. Record fuel use, operating conditions and engine behavior before and after installation under comparable conditions. If you want proof, track it. The operators who see the clearest value are usually the ones who measure the result instead of relying on memory.
Most poor outcomes come back to a few avoidable errors. The first is bad placement – units mounted in excessive heat, exposed to vibration, or crammed where servicing becomes difficult. The second is weak wiring – undersized cable, poor earths, missing fuses or untidy routing. The third is choosing a system size that does not suit the engine or workload.
There is also the maintenance issue. Even the best-installed setup still needs basic inspection. If lines, filters and fluid levels are ignored, performance can drift. The point of fitting a hydrogen system is to reduce operating cost and improve combustion efficiency. That only happens when the installation is treated like part of the engine system, not an accessory you forget about.
Some owners are confident with mechanical and electrical work. Others should not be experimenting under the bonnet. If the vehicle is critical to income, if access is tight, or if the electrical system is more complex than a basic older engine, professional installation can save time and prevent expensive mistakes.
That is especially true for fleets, heavy vehicles, marine applications and generators where downtime carries a real cost. A tested, application-specific install is worth more than a rushed DIY job that needs to be redone. For warranty the system must be installed by a “qualified” auto-electrician or mechanic. DIY installation is not acceptable. Hydrogen Fuel Systems has built its reputation on practical fitment guidance because results come from correct setup, not theory.
A hydrogen kit can absolutely be a smart move for reducing fuel spend and lifting engine efficiency, but only if it is installed with mechanical discipline. Fit it cleanly, wire it correctly, size it properly and test it like you mean it – that is how you turn a kit into a result.

by Gavan Knox. July 4 2026
HFS whats app +61 403177183
gavan@hfuel.com.au
Our Instructions are Detailed , Clear , Easy to read and loaded with diagrams and Photos to explain how to correctly mount and operate our PATENTED Hydrogen Fuel systems
Monday, July 6, 2026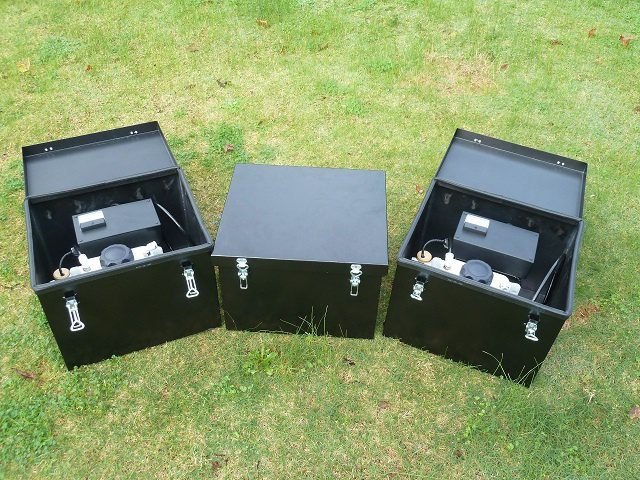
Brilliant Invention Gen 20 Hydrogen Generator ---(update Feb 7... Full Story

by Gavan Knox HFS whats app +61 403177183 gavan@hfuel.com.au... Full Story

Fuel Economy Methodology That Produces Real Numbers - oct... Full Story

Can HHO Improve Towing Economy? Facts That Matter -... Full Story
HHO Versus Additives: What Actually Pays Back? - Oct.... Full Story
Payment Methods Partner:

© 2023 - Hydrogenfuelsystems pty ltd